
Your garage door acts as a massive moving wall that protects your home, your vehicle, and your stored belongings. However, even the highest quality door is only as effective as the seal that surrounds it. Over time, the flexible rubber and vinyl components that bridge the gap between the door and the frame begin to degrade. In the intense sun and humidity of Florida, this breakdown happens even faster.
When these seals fail, your garage becomes vulnerable to water intrusion, pests, and massive energy loss. If you can see daylight poking through the edges of your closed garage door, or if you notice water pooling on the floor after a storm, it is time for garage door stripping repair. This guide will walk you through the types of seals available, the benefits of maintaining them, and a detailed process for replacing them to secure your home.

Benefits of Garage Door Weather Stripping
Many homeowners overlook the importance of the rubber seals around their garage door, viewing them as merely cosmetic. However, weather stripping serves three critical functions that directly impact your wallet and your comfort.
First, there is energy efficiency. If your garage is attached to your home, or if you use your garage as a workspace or gym, temperature control is vital. A gap in your weather stripping functions like an open window. In the summer, it lets humidity and heat pour in, forcing your air conditioner to work overtime to cool the adjacent rooms.
Second is protection against the elements. Florida is known for heavy rains and high winds. Proper weather stripping acts as a barrier, preventing wind-driven rain from seeping under or around the door. This protects your tools, boxes, and drywall from water damage and mold growth.
Finally, there is pest control. Snakes, lizards, palmetto bugs, and rodents can squeeze through impossibly small gaps. A robust seal is your first line of defense against unwanted critters taking up residence in your garage.
Garage Door Weather Seal Models and Compatibility
Before you begin any repair, you must understand what you are working with. Not all weather seals are created equal, and they are certainly not universal.
The Bottom Seal (Astragal): This is the rubber strip that runs along the bottom of the door.
-
T-Style: The most common for steel doors. The rubber has an inverted “T” shape that slides into a channel on the bottom of the door.
-
Bead-Style: Used on specific brands like Wayne Dalton, where the rubber has a round bead that slides into the track.
-
J-Type: Often found on single-track retainers.
The Perimeter Seal (Jamb Seal): This is the stripping that runs up the sides and across the top header of the door frame. It is typically a rigid strip of vinyl or aluminum with a flexible rubber flap attached to it.
Threshold Seal: This is a rubber strip glued directly to the concrete floor. It works in tandem with the bottom seal to close gaps caused by uneven concrete.

How to Replace Garage Door Seal
Replacing the bottom seal is the most common form of garage door stripping repair. This rubber strip takes the most abuse, being crushed against the concrete daily. If it has become brittle, cracked, or flattened, it needs to be swapped out.
Start by identifying the type of retainer you have on the bottom of the door. If the metal channel is damaged or rusted, you may need to replace the retainer itself before you can install a new rubber insert. When selecting material, opt for high-quality synthetic rubber rather than cheap vinyl. Rubber stays flexible in extreme temperatures and conforms better to the floor.
How to Seal Garage Door Gaps
Sometimes, a standard seal is not enough. If your concrete floor has settled over time, you might have a “smile” or a dip in the center of the opening where the door doesn’t touch the ground.
To fix this, you have two options. You can install a larger, “bulb” style bottom seal that has more volume to fill the gap. Alternatively, you can install a threshold seal on the floor. This creates a small dam that blocks water and fills the void under the door. For gaps on the sides of the door, check the track alignment. If the door is sitting too far from the frame, adjusting the track brackets might be necessary to push the door tighter against the perimeter stripping.
How to Seal Garage Door Sides and Top
The perimeter seal (or stop molding) is what prevents wind and rain from entering around the frame. This seal is nailed or screwed directly into the wood door jambs. When the door closes, it presses against the flexible flap of this seal.
To seal the sides and top effectively, you need to ensure the flap is positioned correctly. If it is too tight, the door will bind and may not close properly. If it is too loose, it won’t create a seal. The goal is to have the flap slightly compressed against the door face when the door is in the closed position.
How to Install Garage Door Seal
Whether you are dealing with the bottom or the sides, the general process requires patience and the right tools. You will need a tape measure, a utility knife, a screwdriver or drill, some soapy water (as lubricant), and the correct replacement seal.
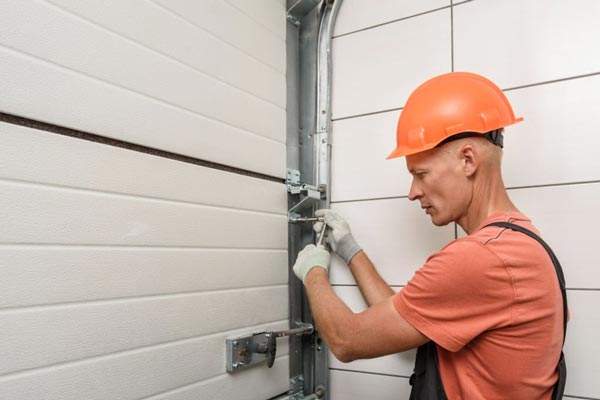
Step 1: Prepare and remove old stripping
The first step in any garage door stripping repair is removing the old, damaged material. For the bottom seal, raise the door to a comfortable working height and lock it in place with vice grips on the track (unplug the opener first for safety).
Removing Garage Door Weather Stripping:
Locate the ends of the bottom seal. There may be small screws or crimps in the metal track holding the rubber in place. Remove these. Pull the old rubber out of the track. It may be stuck due to dirt and grime, so you might need to use pliers to pull it free.
For the side and top weather stripping, remove the screws or nails holding the rigid strip to the door jamb. Use a pry bar to gently remove the old molding, being careful not to damage the wood frame underneath. Once removed, clean the area thoroughly. Use a stiff brush and a household cleaner to remove debris, old caulk, and rust from the bottom retainer tracks.
Step 2: Measure and cut new stripping
Precision is key here. You do not want to come up an inch short.
Measuring and Cutting Your Garage Door Weather Stripping:
Measure the width of your garage door opening for the bottom seal. It is wise to cut the new rubber seal about 3 to 4 inches longer than the door width. The rubber can shrink over time, and having excess allows you to fold it back into the track for a thicker seal at the corners.
For the side and top seals, measure the height of the opening and the width of the header. Cut the rigid carrier of the perimeter seal to fit. You can use a hacksaw for aluminum carriers or heavy-duty snips for vinyl ones.
Step 3: Install new stripping
Now comes the installation phase. This is often easier with two people.
Installing Your Top Garage Door Weather Seal:
Start with the top header piece. Position the molding so the flexible flap rests against the garage door face at a 45-degree angle. Tack it in place with a few nails or screws, but do not tighten them fully yet. Check the seal along the entire width to ensure it is not binding. Once positioned, secure it permanently.
Installing Your New Weather Seals on the Sides:
Repeat the process for the vertical sides. Ensure the top of the side molding overlaps properly with the header molding to prevent water ingress at the corners.
For the Bottom Seal:
Apply a solution of soapy water to the tracks on the bottom of the door. This will act as a lubricant. Fold the “T” or “bead” of the new rubber and slide it into the channel. Pull it across the entire width of the door. This can be difficult if the track is dented, so you may need to use a screwdriver to open up any crimped sections of the track.
Step 4: Check your work
Once everything is installed, test the door manually. Disconnect the electric opener and lift the door by hand. It should move freely without excessive friction from the new seals. If the door is hard to close, you may have installed the side seals too tightly.
Close the door and inspect it from the inside with the lights off. Look for any daylight seeping through the edges. If you see light, you still have a gap that needs addressing.
How to Seal a Garage Door for Winter
While Florida doesn’t experience “winter” in the snowy sense, we do experience cooler temperatures and storm seasons. Sealing a garage door for winter (or storm season) implies creating the tightest possible envelope.
In addition to replacing the rubber seals, check the caulking around the exterior frame of the door. If the caulk between the weather stripping and the house siding is cracked, water can get behind the seal and rot the wood jambs. Apply a high-quality exterior silicone caulk to these joints.

How to Install Garage Door Weather Seal
If you are installing a specialized seal, like a rodent-proof seal (which contains steel wool inside the rubber) or a brush seal, follow the manufacturer’s specific instructions. Brush seals are excellent for uneven floors or commercial applications but can be harder to install. They typically require screwing a new aluminum retainer onto the door.
When to Call a Professional
While replacing a simple bottom rubber insert can be a DIY project, extensive garage door stripping repair is often best left to professionals.
If your bottom track (retainer) is rusted or corroded, it will need to be removed and replaced. This often involves drilling new holes into the steel or aluminum door panel. If done incorrectly, you can damage the structural integrity of the door.
Furthermore, perimeter seals require precise alignment. If installed incorrectly, they can add too much friction, causing your garage door opener to think there is an obstruction. This can result in the door reversing constantly or burning out the opener motor.
At Garage Door On, we specialize in weatherproofing and stripping repair. We carry commercial-grade seals that last longer than the kits found at big-box stores. Our technicians can ensure the seal is airtight without compromising the movement of your door.
Protect your home from the elements and keep your energy bills in check. If your seals are crumbling or gaps are visible, contact Garage Door On today for a professional weather stripping assessment and repair.