
Replacing a garage door is one of the most significant exterior upgrades you can make to your home. It improves curb appeal, security, and energy efficiency. However, before you can choose between a carriage house style or a modern aluminum design, you need to get the numbers right.
Many homeowners assume that all garage doors are standard sizes. While there are common dimensions (such as 8×7 or 16×7), homes settle, concrete shifts, and custom builds often vary by inches. Ordering a door based on a guess can lead to costly installation failures, air gaps, or a door that simply won’t fit the tracks.
Whether you are looking for a quote or planning a renovation, accuracy is paramount. This guide will walk you through the precise steps of how to measure a garage door opening to ensure a seamless installation.

Measure for a New Garage Door
The most common mistake people make is measuring their old door. Wood expands, steel can warp, and the previous installer may have used a door that wasn’t the perfect size for the opening. To get a truly accurate reading for a replacement, you need to measure the finished opening, not the door itself.
Before you begin, ensure you have the right tools. You will need a sturdy metal tape measure (at least 25 feet), a step ladder, a notebook, and a pen. It is also helpful to have a level to check the floor and the header.
Measure Width & Height
The first two numbers any manufacturer or installer will ask for are the width and the height of the “rough” or finished opening. This is the structural frame that the door will sit behind.
Determining the Width:
Take your tape measure and measure the horizontal distance of the opening from the inside of the left door jamb to the inside of the right door jamb. For the most accurate result, measure at three points: the bottom, the middle, and the top. If the numbers vary slightly due to the house settling, use the widest measurement as your reference, but note the variances. The new door must be wide enough to cover the opening without leaving gaps, sealing against the stop molding.
Determining the Height:
Measure the vertical distance from the garage floor to the underside of the header (the beam running across the top of the opening). Like the width, measure this at the far left, the center, and the far right.
-
Crucial Note on Floor Level: If your concrete floor is cracked or uneven, this measurement is vital. If one side is 84 inches and the other is 83.5 inches, you need to know this. The door will be built to the tallest height, and the installer will need to “scribe” or adjust the bottom weather seal to close the gap on the uneven floor.
Measure Sideroom
A garage door does not just float in the opening; it needs a mechanical system to support it. The vertical tracks, springs, and cables are mounted on the wall space immediately to the left and right of the door opening. This space is called “sideroom.”
To measure this, start at the inside edge of the door jamb and measure to the nearest obstruction on the wall. This could be the side wall of the garage, a pipe, a shelf, or a light switch.
-
Standard Requirement: Generally, you need at least 3.75 to 5 inches of clear space on each side for standard vertical tracks.
-
Extension Springs vs. Torsion Springs: If you have an older extension spring system (springs that stretch along the ceiling), standard sideroom is usually sufficient. However, if you are upgrading to a torsion spring system (springs mounted on a bar above the door), you need to ensure the end bearing plates fit. If you have less than 4 inches of sideroom, you may need specialized track hardware.

Measure Headroom
Headroom is the distance from the top of the door opening (the header) to the lowest point of the ceiling or the first obstruction above the door. This is arguably the most critical measurement for the installation of the tracks and the spring system.
Using your ladder, measure from the underside of the header up to the ceiling. Be careful to look for obstructions. A low-hanging light fixture, a fire sprinkler, a garage door opener rail, or an attic pull-down ladder can all reduce your effective headroom.
-
Standard Headroom: Most standard track systems require 10 to 12 inches of clearance.
-
Opener Clearance: If you plan to install an electric overhead opener, you typically need an additional 3 inches, totaling 12 to 15 inches of clear headroom.
-
Low Headroom: If you have limited space (less than 10 inches), do not panic. Specialized “low headroom” tracks (dual tracks) can be installed in spaces as tight as 4.5 inches, but your installer needs to know this beforehand to bring the right hardware.
HEADROOM FOR PROPER TRACK RADIUS
While measuring headroom seems straightforward, the geometry of how the door turns from vertical to horizontal matters. This is known as the track radius.
The standard track usually has a 12-inch or 15-inch radius. The larger the radius, the smoother the door operation, but the more headroom is required.
-
12-inch Radius: Requires roughly 11.5 inches of headroom.
-
15-inch Radius: Requires roughly 14.5 inches of headroom.
If you have high ceilings, you might even consider “high lift” tracks, which allow the door to travel vertically closer to the ceiling before turning back. This is excellent for garages where you want to install a car lift. Conversely, if you measure your headroom and find it lacking, knowing the available space allows your technician to calculate the exact track radius needed to clear the ceiling without hitting the door panels.
Measure Backroom
The final dimension is the depth of the garage, known as “backroom.” This is the distance from the garage door opening back into the garage interior.
Hook your tape measure on the header and pull it back towards the rear wall. You need enough space for the door to retract fully when open, plus space for the automatic opener motor.
-
Calculation: A good rule of thumb is to take the door height and add 18 inches. For example, if you have a 7-foot tall door (84 inches), you ideally need at least 8 feet 6 inches of unobstructed backroom.
-
Obstructions: Look up! Ceiling fans, storage racks, or beams often cut into the backroom space. If you have limited depth, you might need to consider a wall-mounted (jackshaft) opener instead of a traditional ceiling-mounted trolley operator.
Measuring Tips
To ensure your project goes smoothly, keep these professional tips in mind:
-
Check for Square: Measure the opening diagonally from the top left corner to the bottom right, and top right to bottom left. If these two numbers are different, your opening is not square. This doesn’t mean you can’t install a door, but the installer will need to make adjustments to the perimeter seal to hide the difference.
-
Material Matters: Note the material of the jambs (the sides of the opening). Are they wood, steel, or masonry? This dictates what kind of fasteners the installer will bring.
-
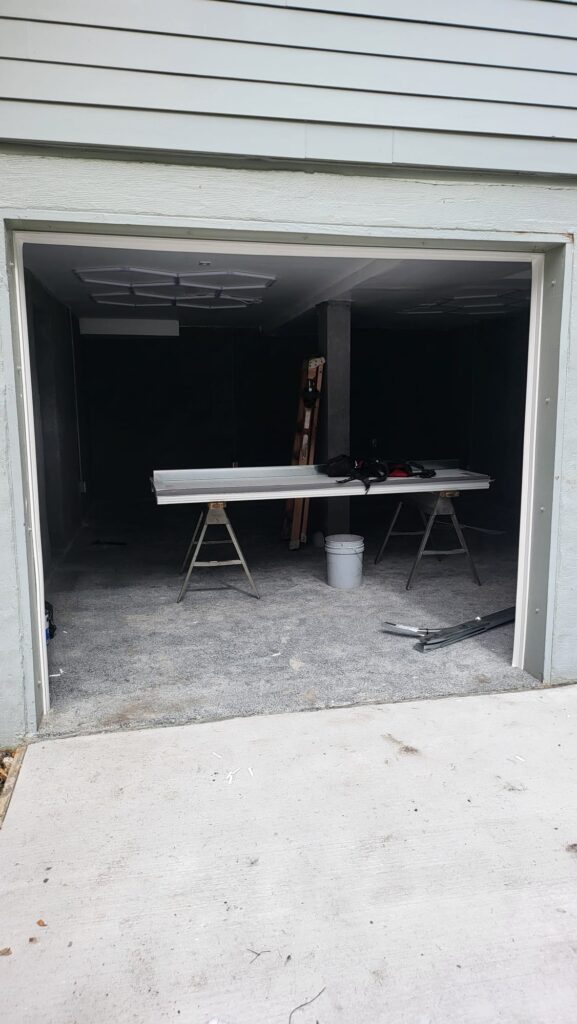
Photos Help: When you contact a professional for a quote, take a photo of the opening from the inside and outside. Pictures can reveal obstructions you might have missed during measuring.
-
Always Round Down: When measuring the width of the opening for ordering purposes, never round up. A door that is slightly too narrow can be fixed with stop molding; a door that is too wide physically won’t fit between the jambs.
Ready for Installation?
While knowing how to measure a garage door is helpful for getting a rough estimate, the precision required for ordering custom doors is best left to the experts. A fraction of an inch can be the difference between a sealed, secure home and a drafty garage.
At Garage Door On, we offer professional site inspections. We will verify your measurements, check the structural integrity of your jambs, and recommend the best track system for your specific headroom and sideroom availability. Contact us today to start your garage transformation.