
Your garage door opener is a modern convenience that most homeowners rely on daily. It seamlessly lifts a heavy wall of steel or wood with the push of a button. However, there are times when this automated system becomes a hindrance rather than a help. Whether you are facing a power outage during a Florida storm, dealing with a mechanical malfunction, or simply need to perform maintenance, knowing how to disconnect garage door opener systems safely is a critical skill for every homeowner.
Disengaging the motor allows you to operate the door manually. While the process is designed to be user-friendly, doing it incorrectly—especially when the door is in the wrong position—can be dangerous. This guide will walk you through the reasons for disconnecting, the safety precautions you must take, and the step-by-step process to switch your door from automatic to manual mode.

Before You Deactivate a Garage Door Opener: When It Makes Sense
There are several scenarios where disengaging the automatic opener is necessary. Understanding these situations can help you react quickly and safely.
Power Outages:
This is the most common reason. If a storm knocks out the electricity, your opener is dead weight. Unless you have a battery backup unit, you will need to disconnect the motor to get your car out of the garage.
Mechanical Failure:
If the motor hums but the door doesn’t move, or if the chain has snapped, the automatic system is useless. Disconnecting it allows you to secure the home and use the door manually until a technician arrives.
Maintenance and Testing:
To ensure your garage door is safe, you should perform a balance test periodically. This requires lifting the door by hand to check if the springs are doing their job. You cannot perform this test while the door is attached to the motor.
Security Concerns:
If you are going on a long vacation, some homeowners prefer to unplug the opener or disengage the trolley and lock the door manually to prevent high-tech thieves from hacking the signal.
How to Disable a Garage Door Opener Safely
Safety is paramount when dealing with garage doors. Before you reach for the release cord, you must assess the condition of the door.
The Golden Rule: Only Disconnect When Closed
The most critical safety rule is to only disengage the opener when the garage door is in the fully closed position.
Why? If the door is open (even partially) and you pull the release cord, the door is no longer held up by the motor. If the torsion springs are broken or weak, the full weight of the door—often hundreds of pounds—can come crashing down instantly. This can result in severe injury, damage to the vehicle below, or destruction of the door panels. If your door is stuck open and you must disconnect it, verify that the door is propped up securely or that the springs are intact before proceeding.
How to Disconnect Your Garage Door Opener
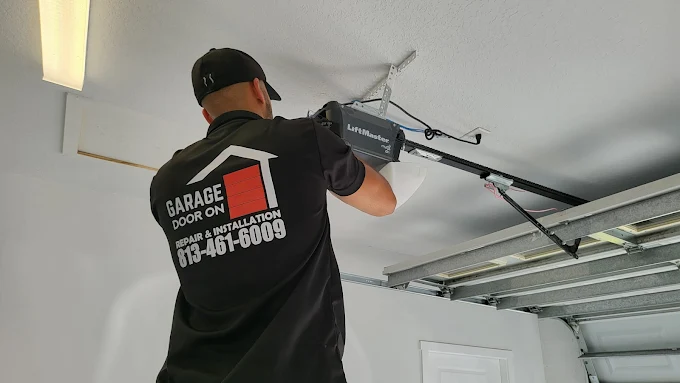
The mechanism that connects the door arm to the motorized rail is called the trolley (or carriage). Disconnecting it is a standard feature on all residential openers.
Step 1: Locate the Emergency Release Cord
Look up at the center rail of your garage door system. You will see a trolley that slides back and forth. Hanging from this trolley is a red rope with a red handle. This is the emergency release cord.
Step 2: Pull the Cord
With the door closed, firmly pull the red handle down and away from the door (towards the motor). You should feel a mechanical click or release. This action disengages the spring-loaded pin within the trolley that latches onto the chain, belt, or screw drive.
Step 3: Test Manual Operation
Once the cord is pulled, the door is in manual mode. Walk over to the door and lift it using the interior handle. It should move freely.
-
Note: If the door feels incredibly heavy or is difficult to lift, do not force it. This is a sign that your springs are broken or unbalanced. Operating a door with broken springs can cause back injury. In this case, gently close the door and call a professional immediately.
How to Reconnect the Garage Door Opener
Once the power is back on or the maintenance is finished, you will want to return to automatic operation. You do not need tools to do this; it is a simple reset procedure.
Step 1: Reset the Trolley Lever
Look closely at the trolley mechanism where the red rope attaches. When you pulled it down to disconnect, a spring-loaded lever likely locked into a “disengaged” position. To reconnect, you typically need to push this lever upward (towards the ceiling) so it is ready to snap back into place.
Step 2: The Automatic Method
Ensure the door is fully closed. Go to your wall button and press it to activate the opener. The motor will move the carriage along the rail. When the carriage passes the trolley on the door arm, it should automatically click and lock back into place. You will hear a distinct “snap” when they engage.
Step 3: The Manual Method
If you prefer, you can reconnect it by hand. With the lever reset to the upward position, lift the garage door manually until you hear the trolley click into the carriage. Once it clicks, try to pull the door down. If it resists, it is locked in.
Need Help with Your Garage Door System?
While disconnecting the opener is a standard homeowner task, issues can arise. If the trolley is stuck and won’t release, or if the door is too heavy to lift manually, these are signs of deeper mechanical problems.
At Garage Door On, we specialize in all aspects of garage door safety and maintenance. Whether you need a spring replacement, a new battery backup opener, or simply a tune-up to ensure your manual operation is smooth, our team is here to help. Contact us today if your door is struggling to operate or if you cannot get the system to re-engage.
